
Honestly, there’s something so satisfying about walking into your room and knowing you made every little thing hanging on those walls. Cute DIY room decor ideas with paper crafts are having a serious moment right now and for good reason. Paper is cheap, easy to find, and way more versatile than people give it credit for. You can go minimal and modern, or totally whimsical and colorful it all depends on your vibe. I’ve seen bedrooms completely transformed with nothing but cardstock, scissors, and a little patience. So if you’ve been scrolling for inspiration and feeling like you need some fresh ideas, you’re in the right place. Let’s get into it.
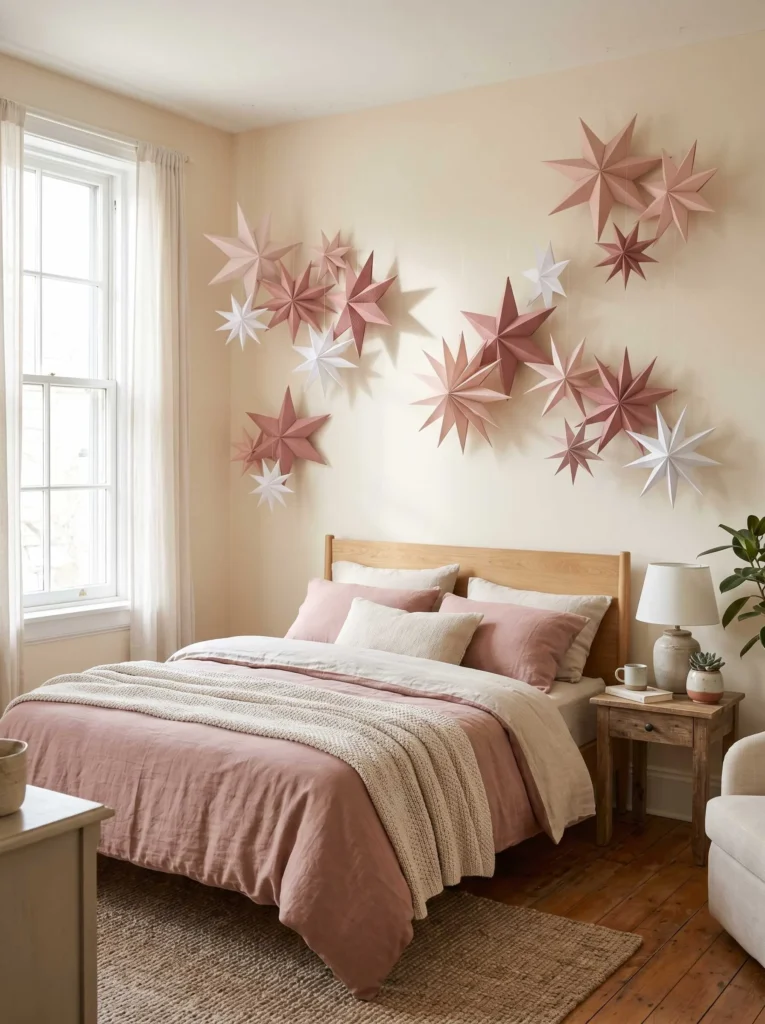
Folded Paper Star Wall Clusters
One of my favorite things to make for a bedroom wall is a cluster of folded paper stars in different sizes. You start with square sheets of paper I love using kraft paper or pastel cardstock and fold them into pointed 3D star shapes using a basic origami technique. When you arrange them in an organic cluster on the wall, they catch the light in the most beautiful way. Try mixing two or three tones of the same color family, like blush, dusty rose, and white, so everything feels cohesive but still interesting. The texture these stars add to a flat wall is honestly kind of incredible. You can even hang them at slightly different heights using thin thread or fishing line for that floaty, suspended look.
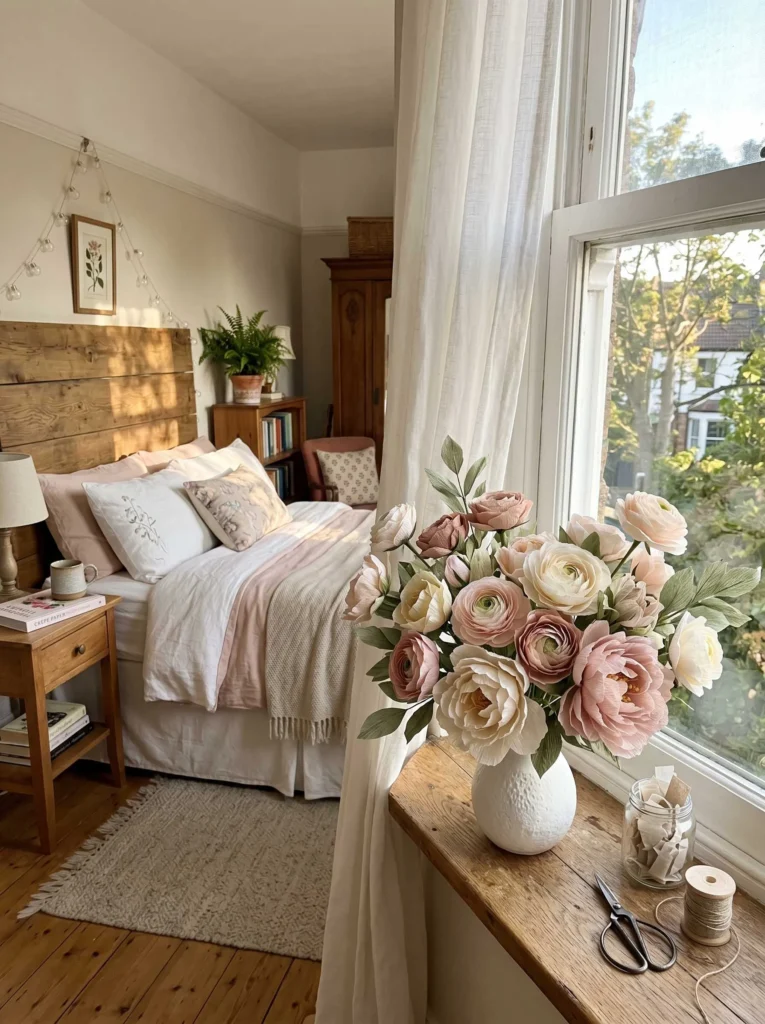
Paper Flower Bouquet in a Vase
If you want something that feels romantic and cottage-core without spending a lot, try making paper flowers and arranging them in a simple ceramic vase. Crepe paper works best here because it has that soft, slightly crinkled texture that mimics real petals really well. You can shape each petal by stretching the crepe paper gently between your fingers, then wrap them around a floral wire stem. Go for a mix of ranunculus, peonies, and wildflower shapes for a bouquet that looks lush and layered. I think the trick is not making all the flowers the same size keep some smaller and more closed, and let others bloom open fully. Set it on a windowsill or a shelf and it honestly looks like something from a home décor store.
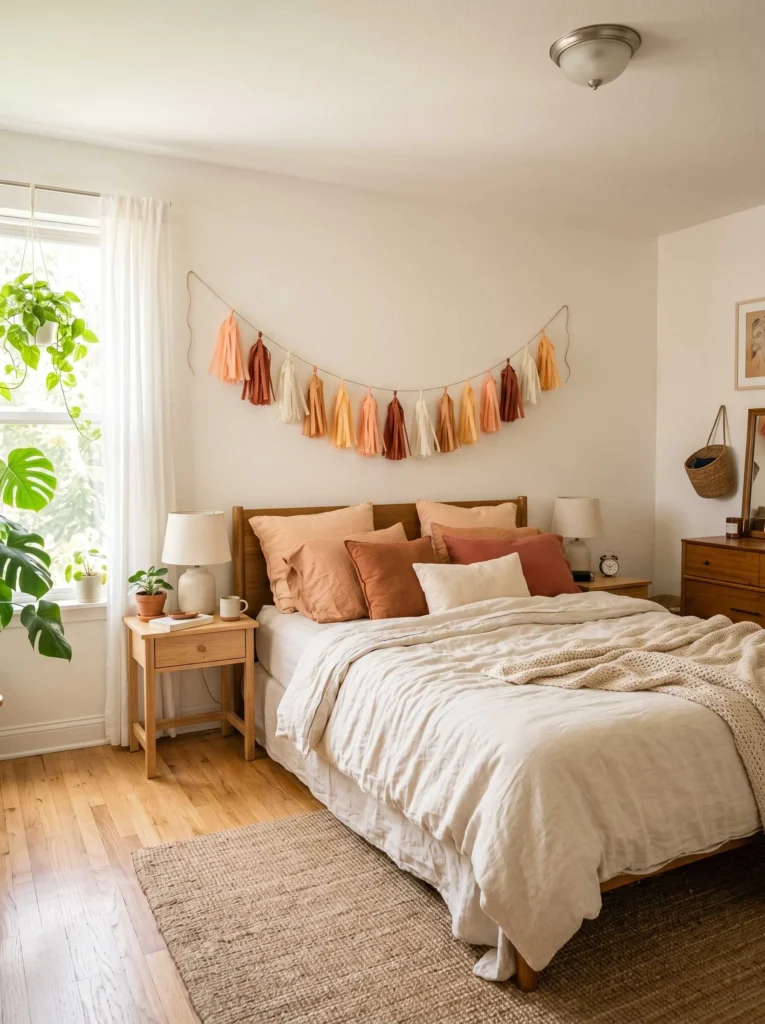
Paper Tassel Garland Above the Bed
Tassel garlands are one of those things that look super impressive but are genuinely so simple to make. You just need tissue paper in a few coordinating colors, cut into strips, then folded and twisted at the top to form that classic tassel shape. String them along a piece of twine or thin ribbon and hang it above your headboard for an instant boho moment. I love using a color palette that ties in with your bedding so if you have blush and terracotta tones going on, do your tassels in peach, rust, and cream. The way the tissue paper moves gently in a breeze from the window is just so pretty. It also works really well above a desk or along a doorway if you want to spread the craft love around the room.
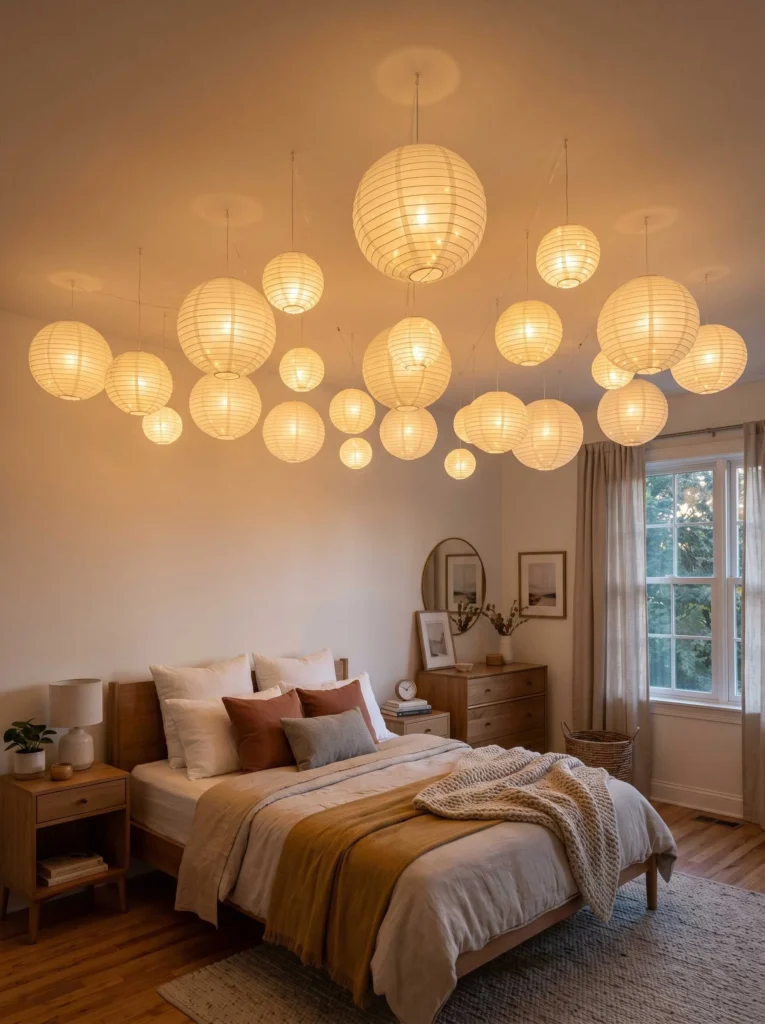
Paper Lantern Ceiling Decoration
Hanging paper lanterns from the ceiling is one of those ideas that transforms a room completely without much effort at all. You can buy plain white round lanterns and then customize them with paint, washi tape, or even hand-drawn patterns using a fine-tipped marker. Try hanging several at different heights using clear string some high, some lower so the ceiling looks layered and interesting. If you want a warmer glow, tuck a string of LED fairy lights inside each lantern. The light that filters through the paper is so soft and dreamy, especially at night. This works especially well in rooms with higher ceilings, but even in a standard bedroom it adds this cozy, almost café-like atmosphere that I’m totally obsessed with.
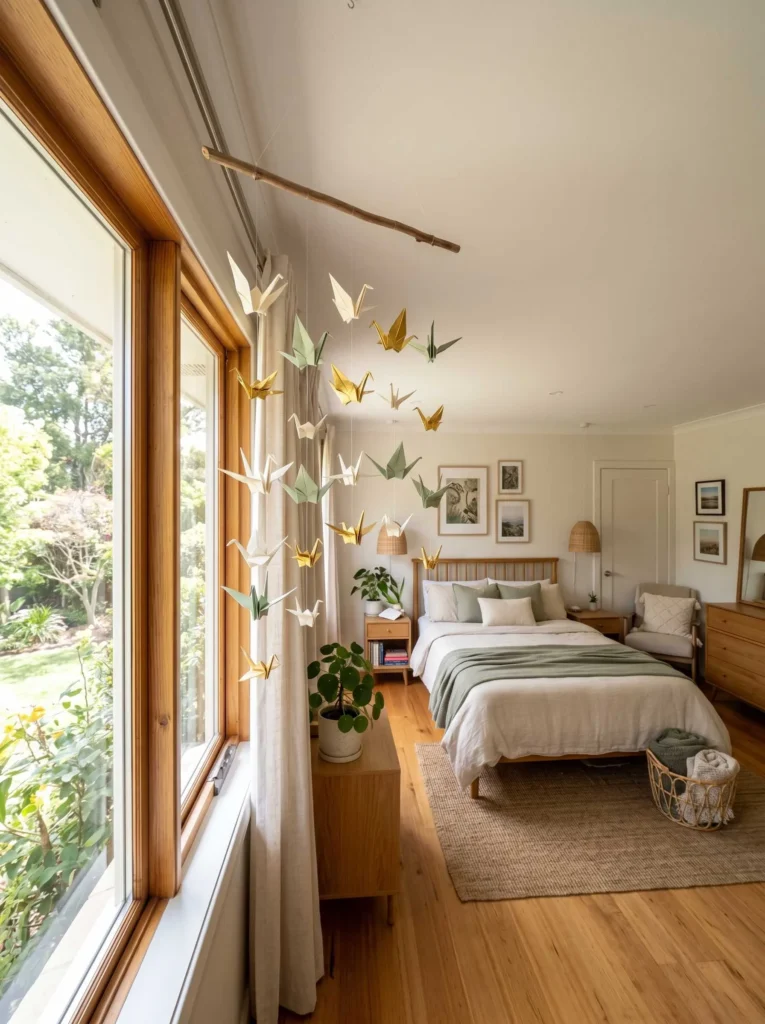
Origami Crane Mobile
There’s something so timeless about a mobile made of origami cranes. You fold each crane from square sheets of paper traditional white looks stunning, but so does a mix of metallic gold, sage green, and ivory. Once you have around 20 to 30 cranes made, you tie them to thin wooden dowels or branches using invisible thread at varying lengths. Hang the whole thing near a window so the cranes spin gently and catch natural light throughout the day. I think this piece works especially well in a more minimal room where you want one big statement rather than lots of smaller accents. It’s also a great project to do while listening to a podcast or playlist very meditative once you get into the folding rhythm.
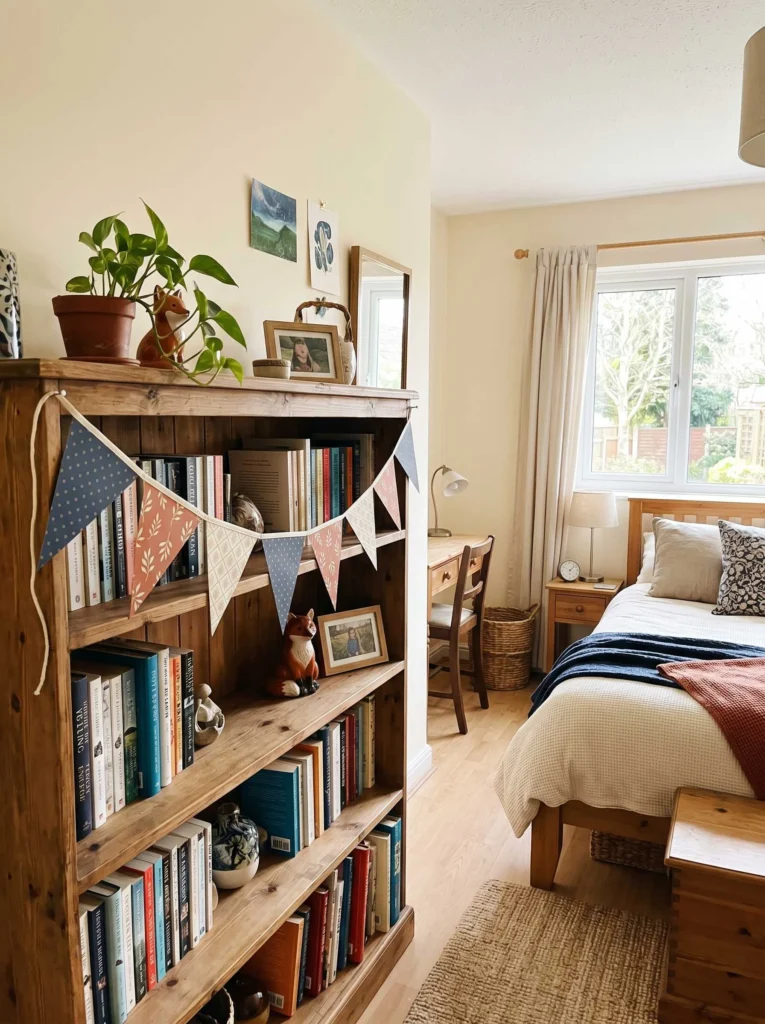
Paper Bunting Banner
Bunting banners are so cheerful and they honestly work in any style of room from maximalist to minimal. Cut triangles from patterned scrapbook paper, cardstock, or even pages from old magazines or maps for something more eclectic. Fold the top edge of each triangle over a piece of twine and glue it down, spacing them evenly along the string. You can go classic with alternating patterns, or keep it tonal with different textures in the same color family. I feel like map-print bunting in particular looks amazing in a travel-themed room or a dorm. Hang it along a bookshelf edge, above a window, or draped across a mirror for that casual, lived-in feel that never goes out of style.
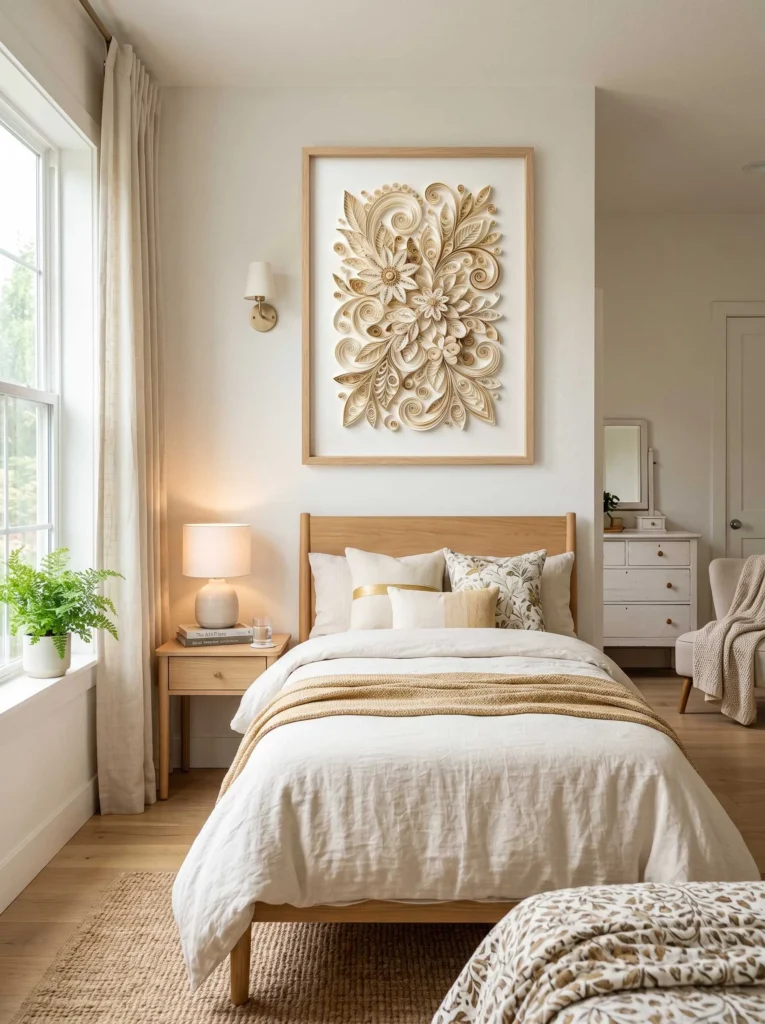
Rolled Paper Wall Art
Rolled paper art sometimes called quilling is one of the most underrated paper crafts out there. You take thin strips of paper, roll them tightly into coils, and then pinch and shape them into petals, leaves, spirals, and swirls. From there, you arrange and glue them onto a canvas or a piece of cardstock in a pattern or design of your choice. It could be a simple botanical motif, a butterfly, or even an abstract swirling pattern. The detail and texture that comes from this technique is genuinely jaw-dropping people always assume it took way longer than it did. I love using cream and gold tones for a sophisticated look, or bright jewel tones for something bold and playful. Frame it and it becomes serious wall art.
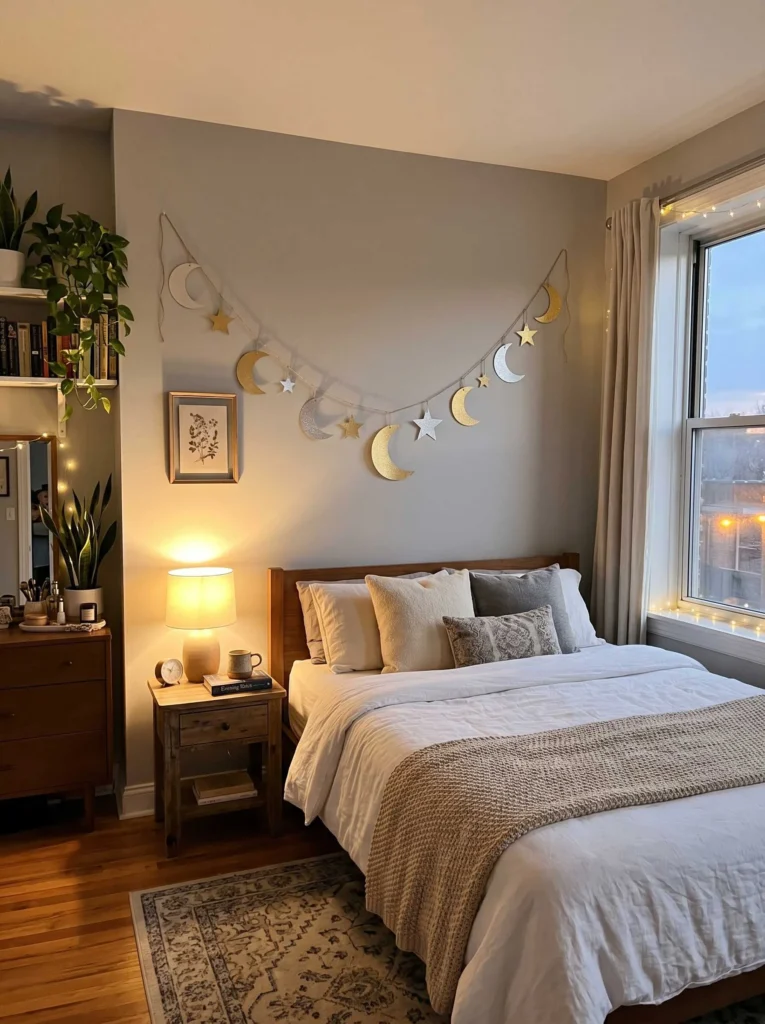
Paper Moon and Stars Garland
A moon and stars garland is one of those décor pieces that works in a kids’ room, a teen bedroom, or even a grown-up boho space it’s just that versatile. Cut crescent moon and star shapes from gold or silver cardstock, then punch a small hole at the top of each shape and thread them onto a long string or ribbon. Stagger the sizes so you have big stars mixed with tiny ones, and maybe a few larger moon shapes as anchor pieces. Hang it diagonally across a wall or drape it across a shelf for a celestial, dreamy effect. I honestly think this looks even better when the room has dim, warm lighting in the evening it gives everything this magical, storybook quality that I love.
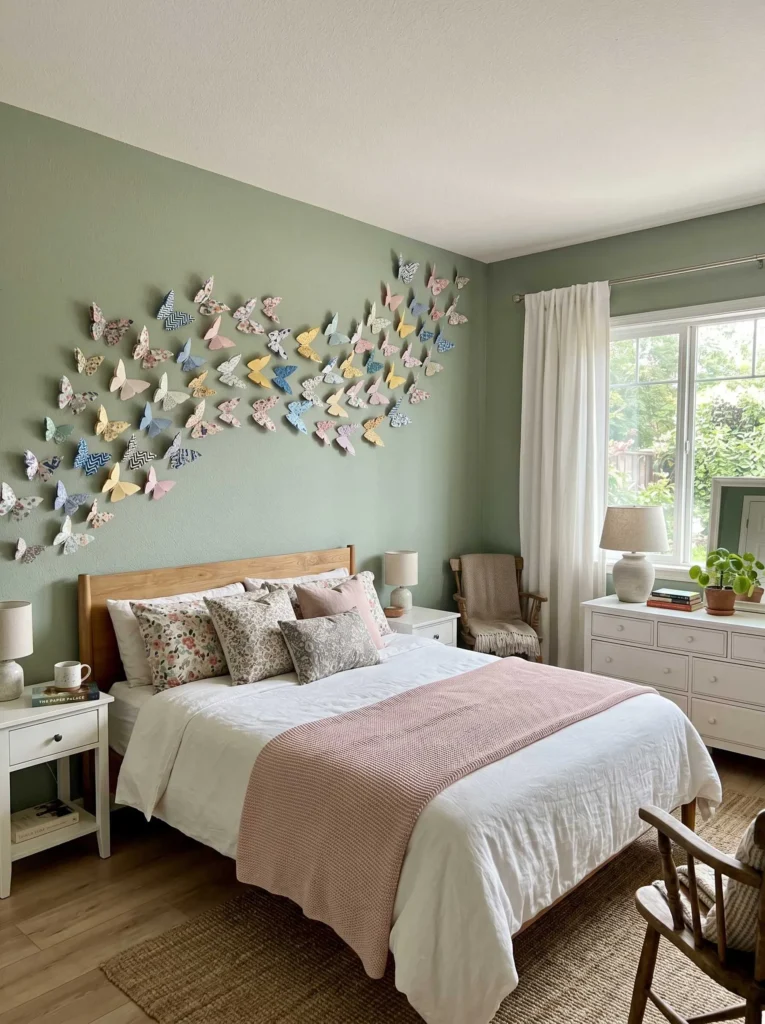
Paper Butterfly Wall Display
A wall covered in paper butterflies is one of those ideas that looks complicated but really isn’t. You fold small pieces of patterned or solid-colored cardstock into simple butterfly shapes, then attach them to the wall with a small loop of tape on the body, leaving the wings free to lift slightly away from the surface. This gives them a 3D, almost floating quality that looks so good. Try arranging them in a swooping arc or a loose spiral pattern like they’re in mid-flight across the wall. Using a mix of prints, like floral, geometric, and solid, keeps the display feeling lively rather than flat. This is especially beautiful above a desk or on a feature wall behind the bed.
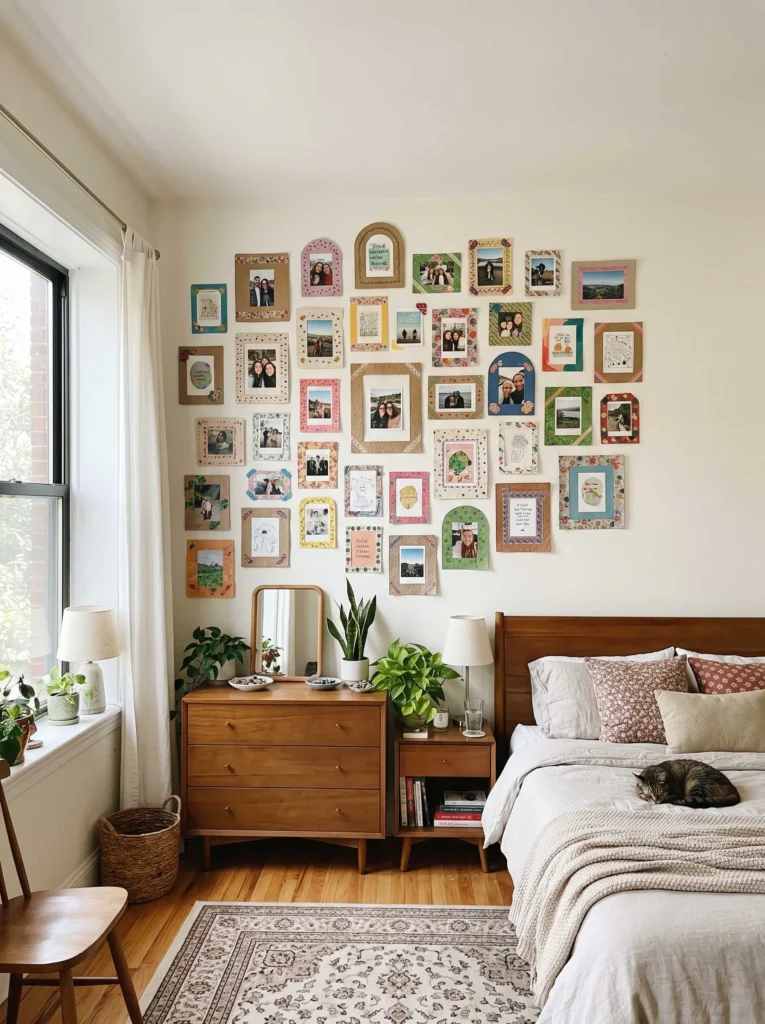
Paper Frame Collage Wall
If you love the gallery wall trend but you’re not ready to commit to buying frames, make them out of paper instead. Cut large rectangle and square frames from thick cardstock or cardboard, decorate the edges with paint, washi tape, or marker details, then mount your photos or art prints inside them using removable adhesive. The frames don’t have to be perfect slightly imperfect edges actually add to the handmade charm. You can mix different “frame” styles, like one simple solid border, one with a decorative inner edge, and one with a scalloped or deckled effect. I think this works so well for renters or anyone who doesn’t want to put too many holes in the wall, since the whole thing can come down without a trace.
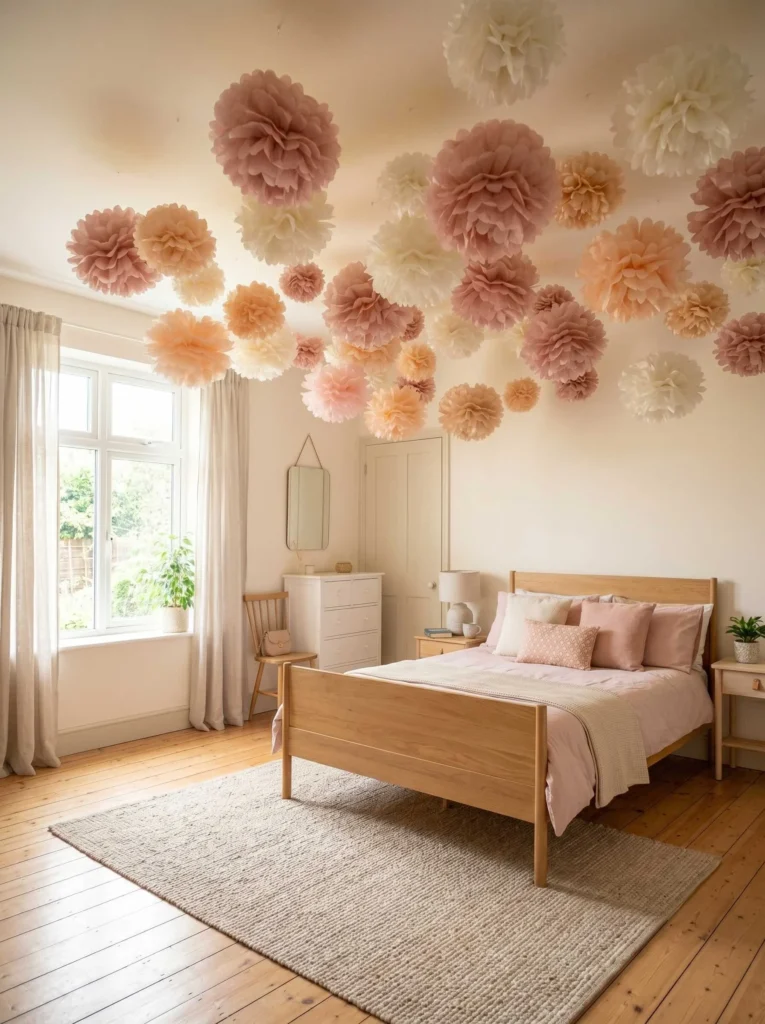
Paper Pom-Pom Garland
Paper pom-poms made from tissue paper are big, fluffy, and honestly just so fun to hang in a room. The process is straightforward you stack several sheets of tissue paper, fold them accordion-style, tie the middle with wire or floss, then fan out and fluff each side into a full sphere. Make several in different sizes and colors, then hang them from the ceiling at varying heights for a festive, cheerful effect. I like using this in a maximalist room where you want a lot of visual energy, or even as a backdrop for a reading nook or vanity area. The great thing about tissue paper pom-poms is that they’re so lightweight even just a tiny command strip can hold them up with no trouble.
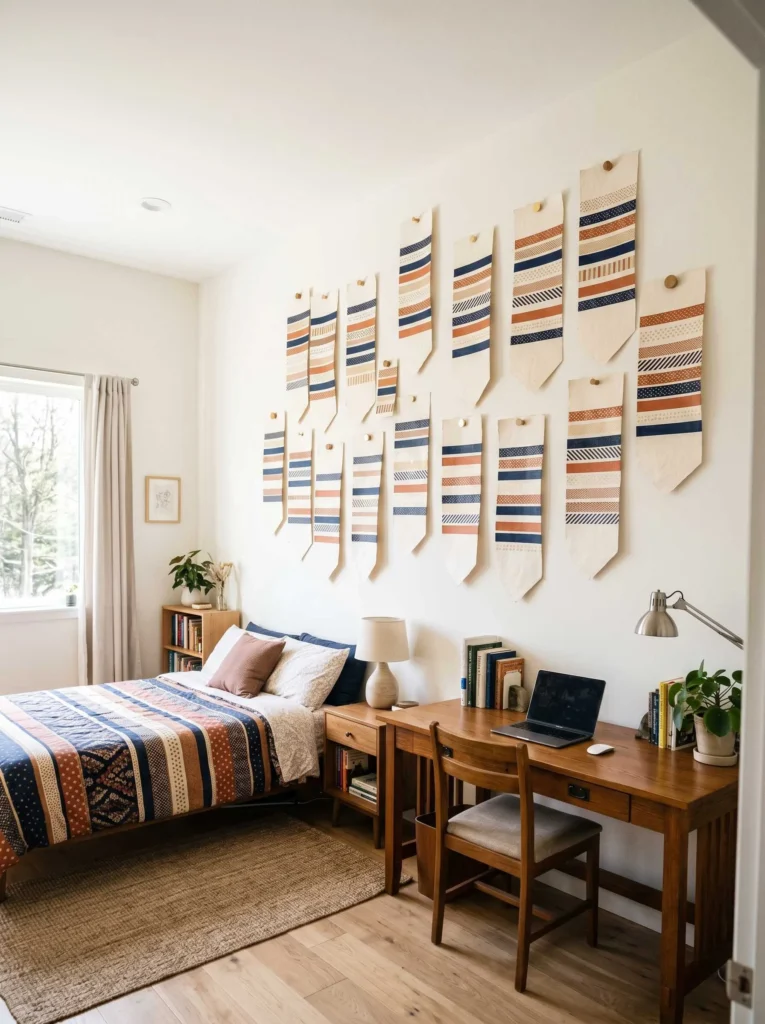
Washi Tape Paper Bookmarks as Wall Art
Okay, this one is a little unexpected but stay with me. You create oversized decorative “bookmarks” from cardstock long, narrow rectangles with a pointed or rounded bottom and decorate them with washi tape stripes, geometric patterns, or stamped details. Then you arrange them in a loose, overlapping fan or cascade on the wall. The result looks like abstract textile art but made entirely of paper. Using tapes in a consistent color story, say navy, terracotta, and cream, ties everything together really nicely. I think this works brilliantly in a study or home office space where you want something visual but not too distracting. It’s one of those ideas that looks intentional and designed, even though the process is super casual.
Paper Leaf Wreath
A paper leaf wreath on the door or above the bed gives a room that earthy, natural feel without any real plants required which is perfect if you, like me, tend to accidentally kill succulents. Cut leaf shapes in varying sizes from green, olive, and golden-yellow cardstock, then score and fold them slightly down the center so they have a realistic curl. Layer them around a circular base — even a cardboard ring works using hot glue, building up from the outside in. Add a few paper berries or small paper flowers in the center for variety. The finished wreath has this beautiful, textured quality that looks genuinely lush. Swap out the leaf colors seasonally deep burgundy and amber for fall, fresh mint and lime for spring.

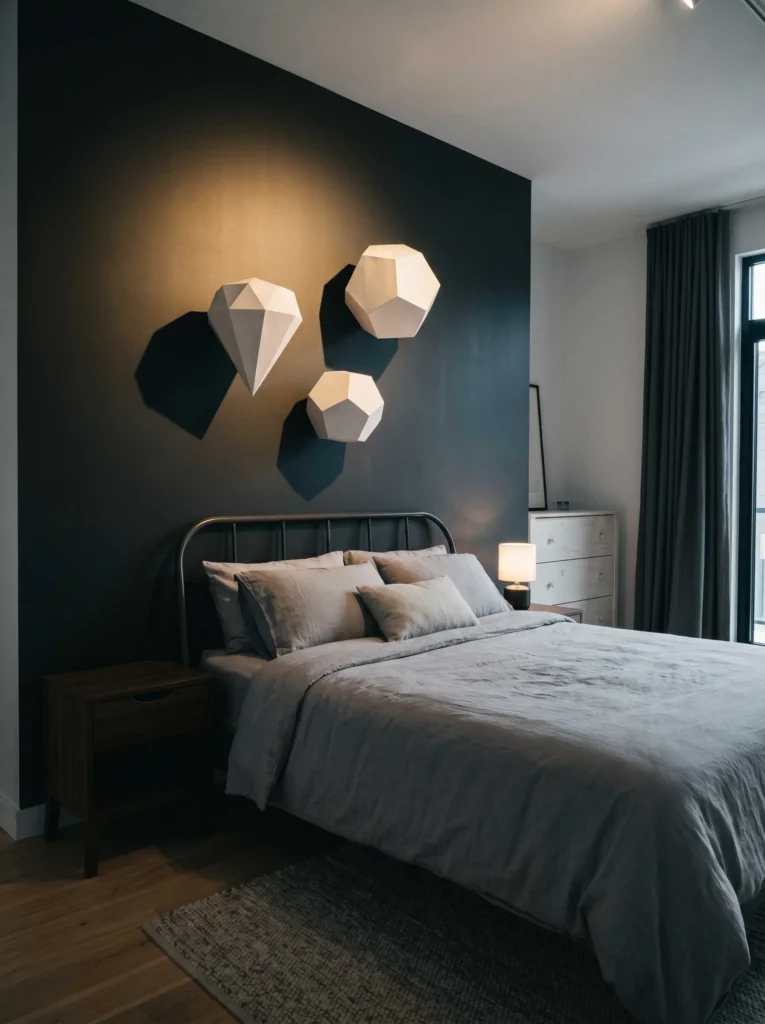
Paper Geometric Wall Sculpture
Geometric 3D paper sculptures are having such a big moment in interior design right now, and honestly, the DIY version looks just as good as anything you’d buy. You create triangular or polygonal shapes by scoring and folding thick cardstock, then connecting the faces with tape or glue to build out faceted forms like diamonds, dodecahedrons, or low-poly animal heads. Paint them once assembled matte white looks incredibly sleek and architectural, while metallic gold or copper reads more glam. Hang one large piece as a focal point or arrange three or five in an asymmetric grouping. I think these look especially stunning against a dark wall where the dimensional shadows really show up and the sculpture feels like true art.
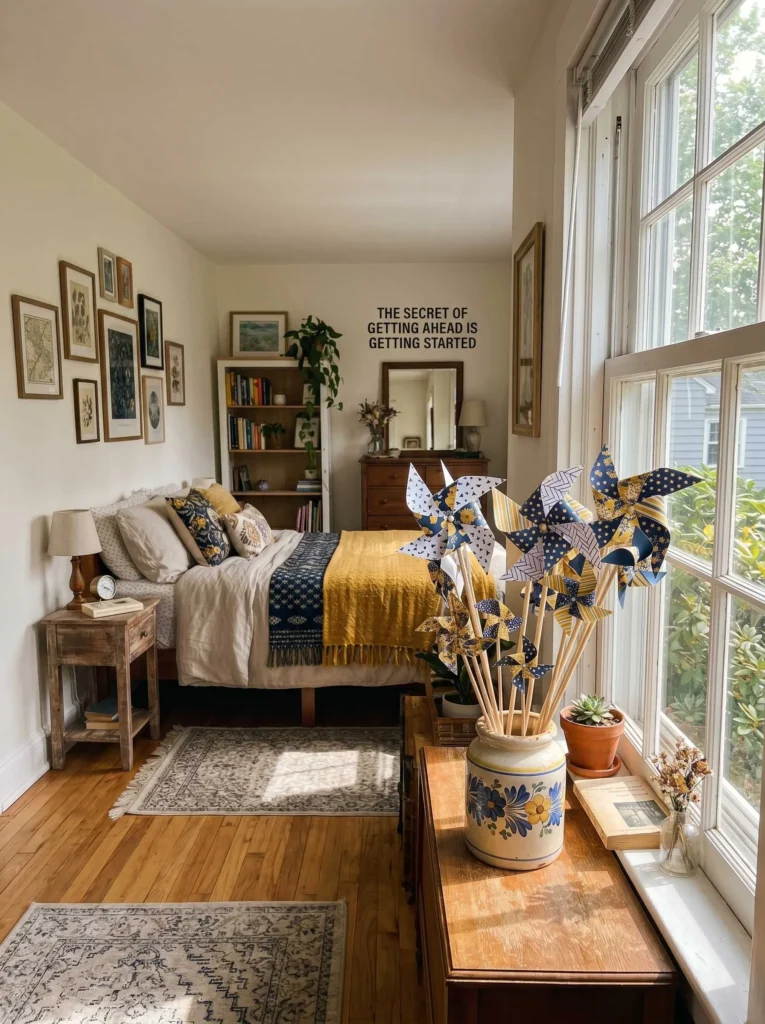
Paper Pinwheel Display
A pinwheel display is so playful and nostalgic it immediately brings a sense of lightness and fun into a room. Make pinwheels in a range of sizes using double-sided patterned cardstock so both sides of the wheel show a different pattern or color. Mount them on wooden skewers or thin dowels, then display them in a painted jar or a vintage bottle as a decorative arrangement. You can also pin them flat to the wall in a scattered cluster, where they look like an abstract floral pattern. Try a palette of navy, white, and yellow for a fresh, graphic feel or go all-pastels for something softer. These are especially great in a shared kids’ room or a cheerful studio apartment where you want maximum personality for minimum cost.
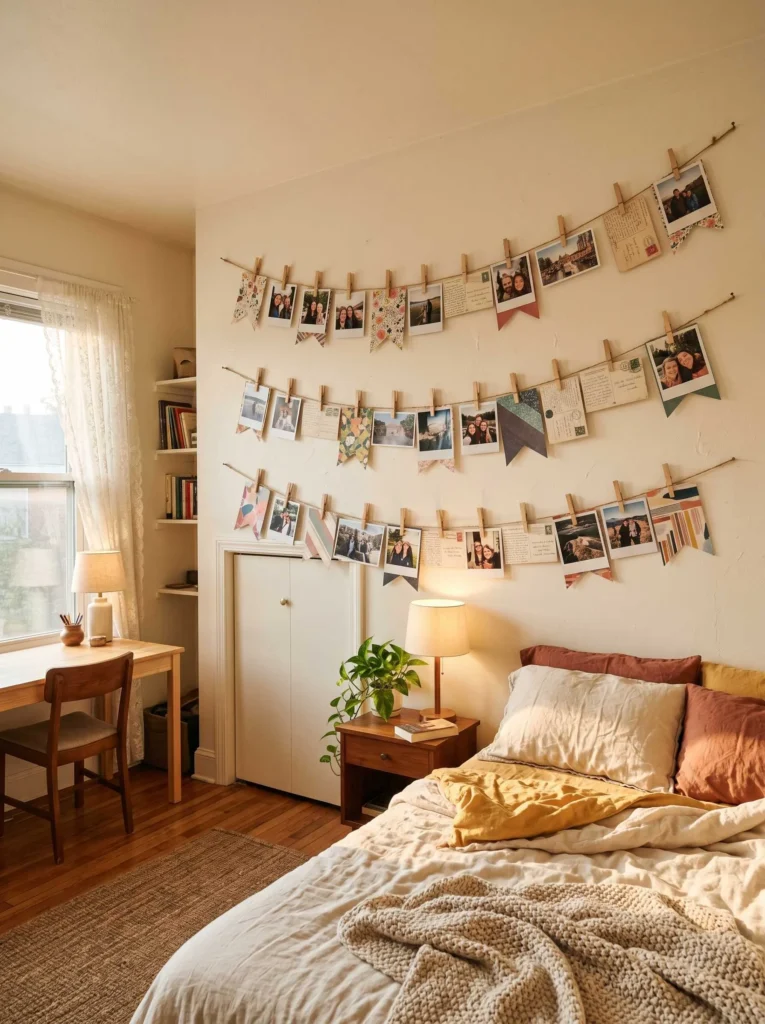
Paper Photo Hanging with Clips
This one is a classic for a reason it works every single time. Take a few lengths of thin twine or jute rope and stretch them horizontally across a section of wall. Then clip photos, postcards, art prints, or quotes onto the line using small wooden or metallic binder clips. But here’s the paper craft twist: make small paper flags, envelopes, or tab dividers from patterned cardstock and hang those alongside the photos to fill gaps and add texture. You end up with a display that feels curated and personal, with a mix of imagery and handmade details that makes it totally unique to you. I love seeing rooms where this becomes a slowly evolving gallery that grows over time as people add new things.
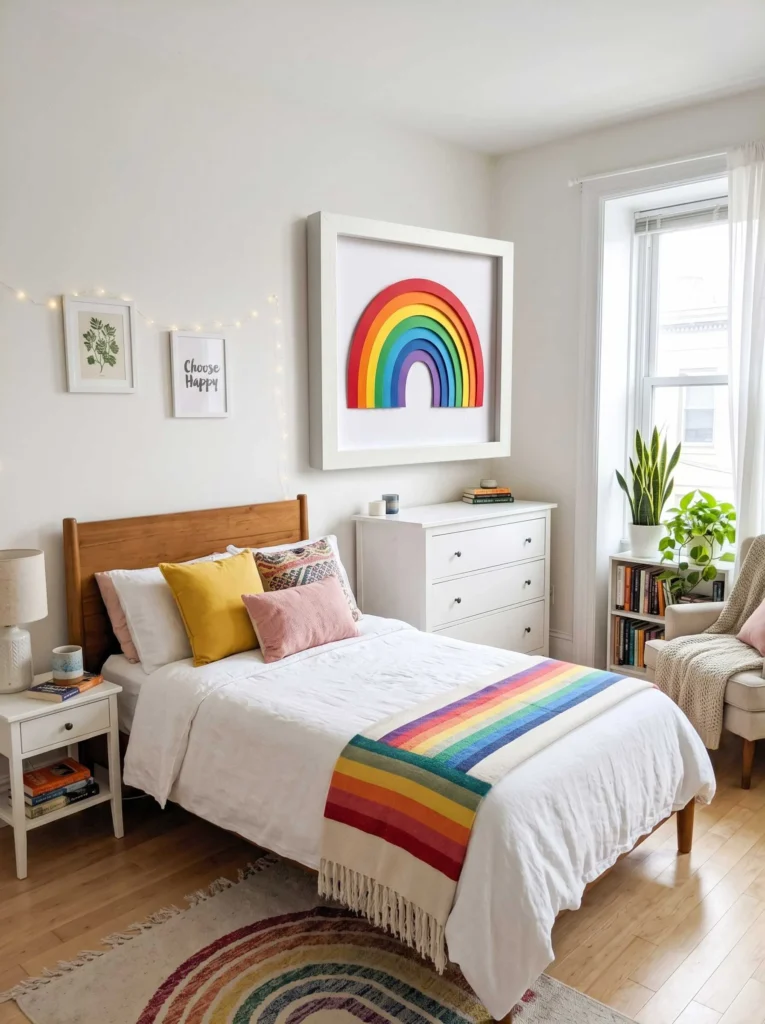
Paper Rainbow Wall Art
A layered paper rainbow is one of those pieces that works in a room whether it’s meant for a child or a fully grown adult who just loves color I fully stand by that. You cut arching strips in each rainbow color from cardstock or construction paper, then layer them concentrically from the widest (outer) arch down to the narrowest (inner), gluing each layer on top of the last. Back the whole thing on white or cream cardstock and frame it, or leave it unframed for a softer look. The layering creates a subtle shadow effect between each color band that makes the piece feel textured and dimensional. Honestly, this is one of those pieces that always draws a compliment from anyone who sees it and when you say you made it, they genuinely can’t believe it.
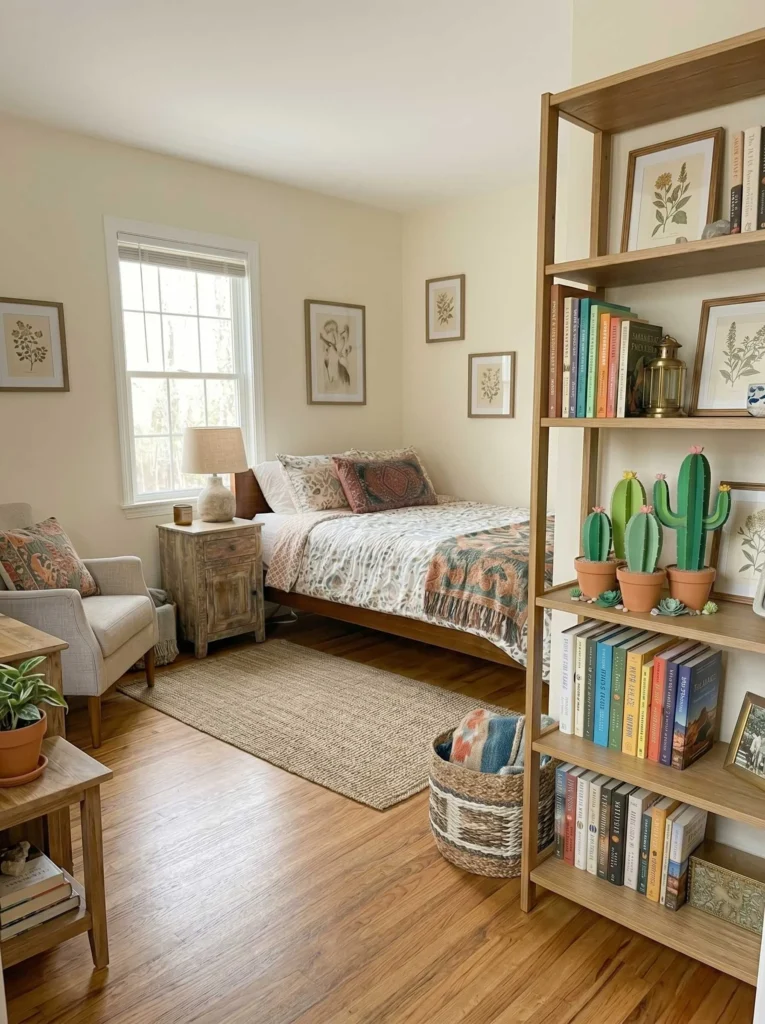
Paper Cactus Shelf Decoration
If you love the idea of plants on a shelf but don’t have the sunlight or patience for real ones, paper cacti are the most charming alternative. Cut cactus body and arm shapes from thick green cardstock several shades of green add depth then score the surfaces lightly to mimic ribs and add small white straight-pin “spines” for texture. Stand them up in small pots filled with air-dry clay or sand so they’re stable and freestanding. Tuck a few small paper succulents and pebbles around the base and the whole thing looks like a tiny desert tableau. I think a cluster of three different-height cacti on a bookshelf or windowsill is one of the cutest room accents you can make and it never needs watering.
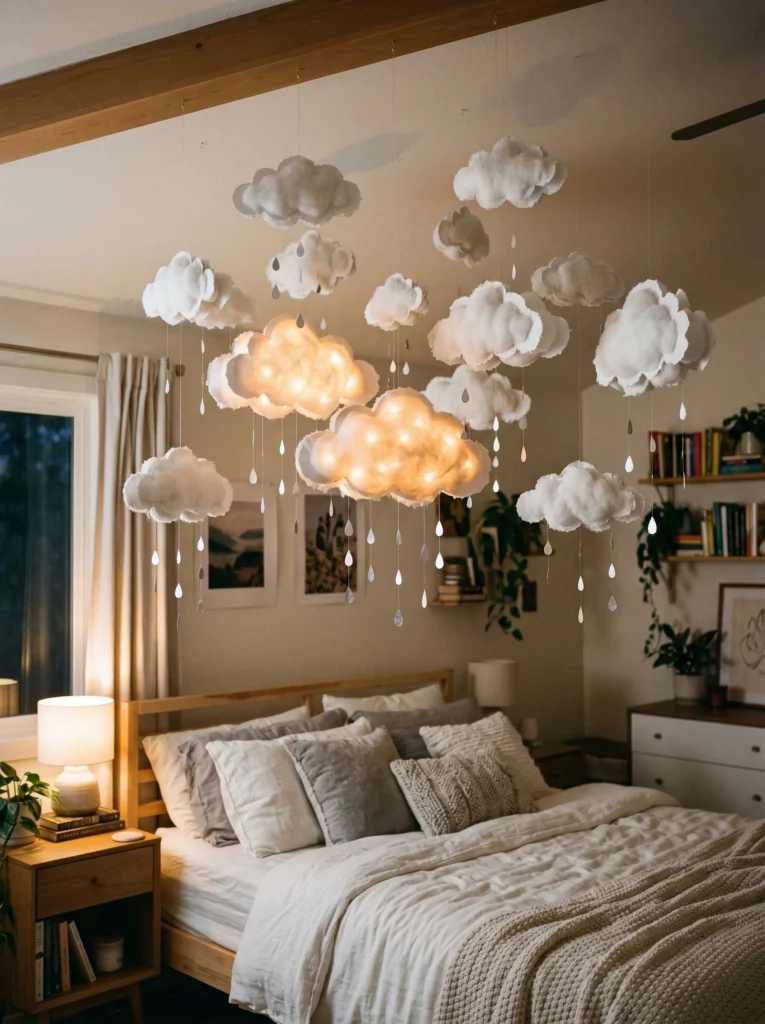
Paper Cloud Mobile for Above the Bed
Floating paper clouds above a bed create this dreamy, sleeping-under-the-sky effect that I think is genuinely magical. Cut large cloud shapes from thick white cardstock or foam board, layer two identical pieces together with a slight fill of cotton batting inside for a soft, puffy look, then hang them from the ceiling using clear thread at different heights. Add a few paper raindrops in silver or blue hanging down from each cloud for extra whimsy. You can also tuck in tiny LED fairy lights for a soft glow that makes the clouds look backlit and glowing. I feel like this idea works in a child’s room but also in any bedroom where the person wants a cozy, escape-from-the-world kind of atmosphere which is honestly all of us.
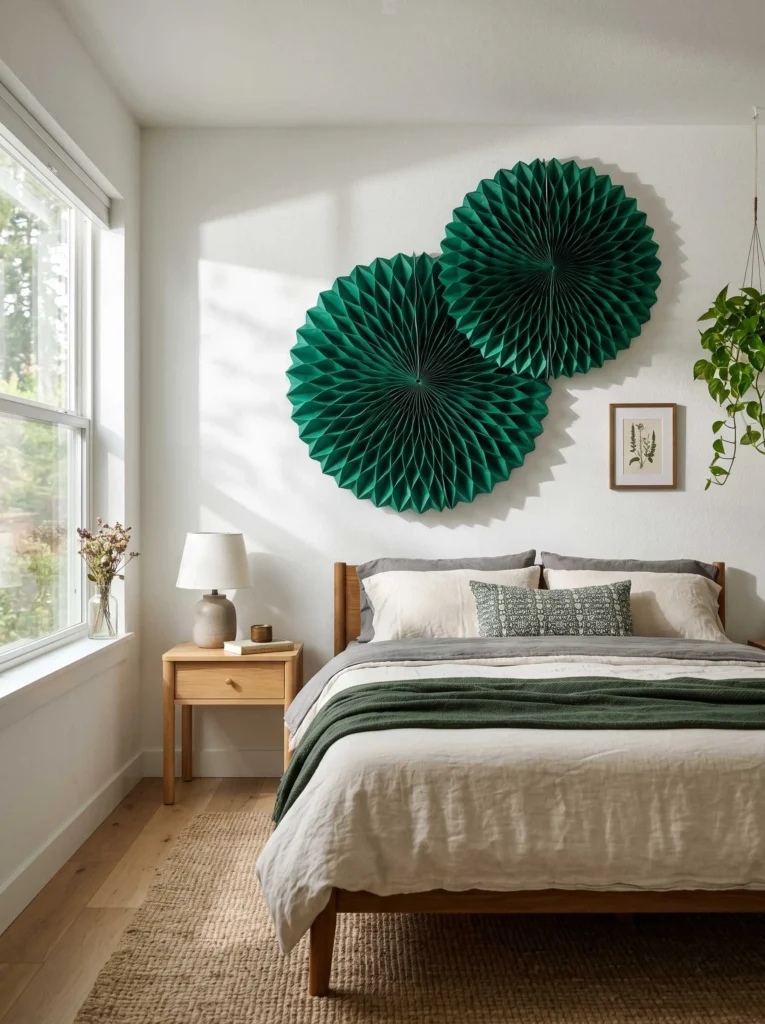
Paper Honeycomb Wall Panels
Paper honeycomb panels are those accordion-style decorative pieces you’ve probably seen at parties but when you use them in a room as permanent décor, they look genuinely architectural. Hang a large honeycomb fan in a deep jewel tone think emerald, sapphire, or burgundy on a white or neutral wall and it becomes an instant focal point. You can layer two or three overlapping panels in coordinating colors for a more dynamic effect. The texture of the honeycomb structure catches the light beautifully and changes throughout the day as natural light shifts across the room. I think this is one of the easiest high-impact paper craft projects you can do because the panels come pre-made and you just style and hang them almost zero construction required.
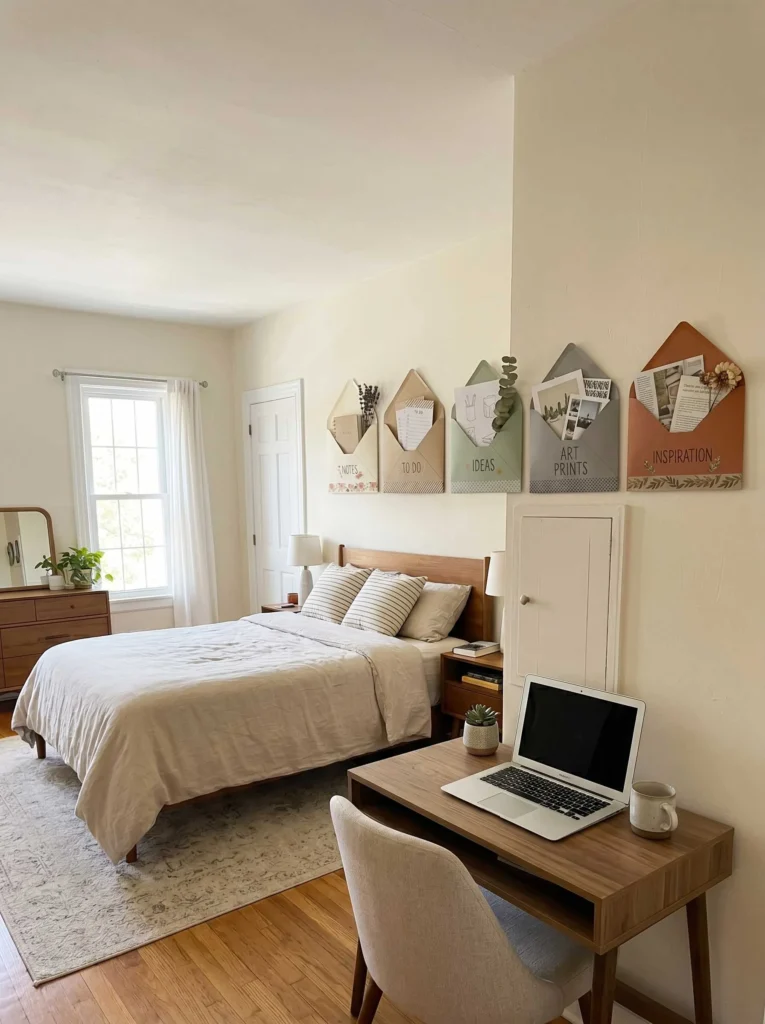
Paper Envelope Wall Pockets
This one is both decorative and functional, which I always love. You fold thick cardstock into simple envelope or pocket shapes, seal the sides with tape or a bone folder, then mount them on the wall in a row or grid pattern. Leave the tops open so you can tuck things inside small notes, dried flowers, folded quotes, tiny art prints, or even a fresh sprig of eucalyptus. Decorate the front of each envelope with stamps, washi tape, or hand-lettered labels so the whole arrangement looks intentional and styled. This works beautifully above a desk where you want a functional display that doubles as organization, or in a hallway for an eye-catching entryway moment. It’s the kind of décor that makes a space feel lived-in and personal.
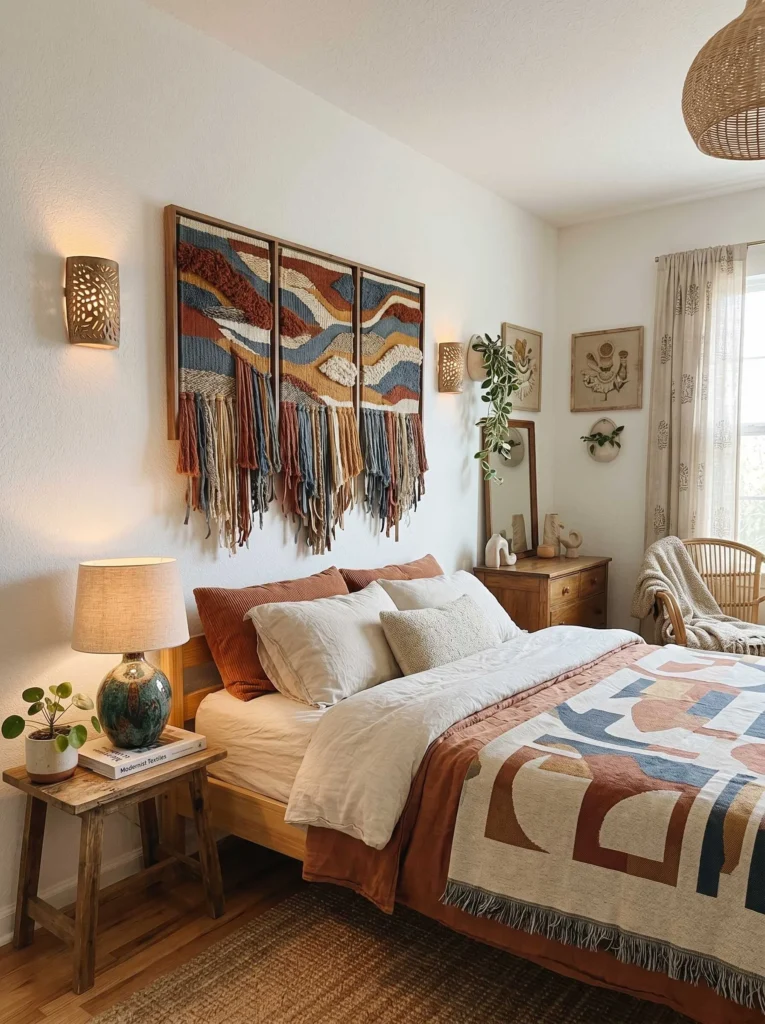
Paper Woven Wall Hanging
Weaving with paper strips is one of those crafts that feels almost meditative once you get into the over-under rhythm, and the finished result honestly looks like textile art. Cut strips of paper in various widths and colors, then weave them together on a simple loom made from a piece of cardboard with notched edges. You can do a classic plaid weave, a diagonal chevron, or a more freeform pattern where you mix widths and leave some strips longer than others for a fringe-like effect at the bottom. Mount the finished piece on a wooden dowel and hang it like a tapestry. Using natural tones cream, sand, terracotta, sage gives it that sophisticated woven textile look that’s so popular in Scandinavian and boho-style rooms right now.
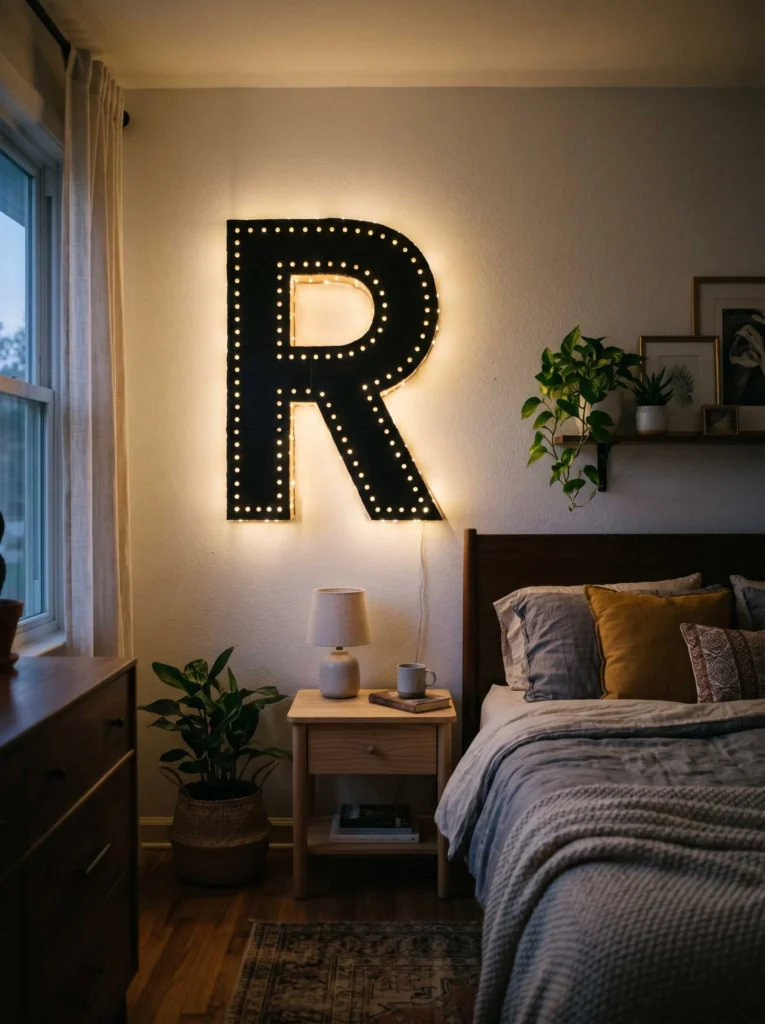
Paper Marquee Letter Lights
Marquee letter decorations are so fun and personal especially when you make them yourself from cardboard. Spell out your initials, a favorite word like “dream” or “create,” or even just a single bold letter as a statement piece. Cut the letter shape from thick cardboard, score and fold a border strip around the edges to create depth, then punch evenly spaced holes along the front face and push through a string of warm LED fairy lights. The glow that comes through those tiny holes at night is so cozy and warm. You can paint the whole thing in matte black for a bold, graphic look or gold for something more glam. I think a personalized initial in this style is one of the most charming things you can put in a bedroom it’s specific to you in a way store-bought décor never quite is.
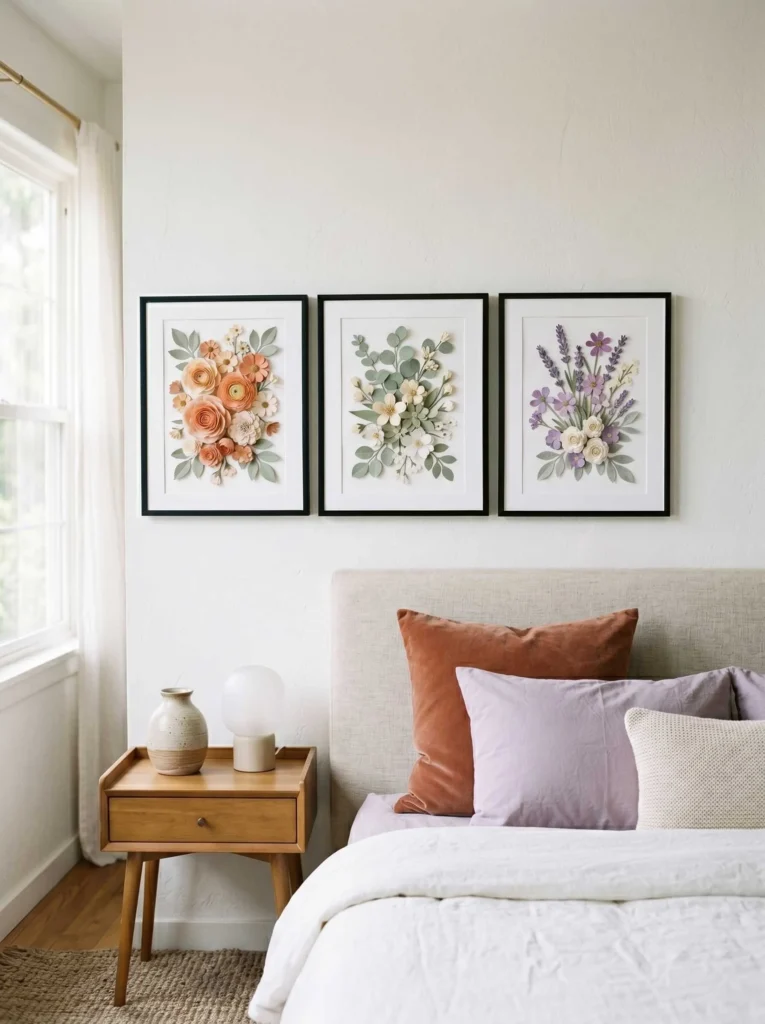
Paper Pressed Flower Frame Art
Pressing paper flowers or real flowers onto paper backgrounds and framing them creates that botanical art print look that’s been all over interior design lately. You can either press real flowers between pages of a heavy book, then mount them on watercolor paper, or cut incredibly detailed paper flower shapes and arrange them in a pressed, flat composition on a white card. Either way, the result is something that looks like it belongs in a vintage apothecary or a modern botanical studio. Frame it simply in a thin black or natural wood frame and hang it in a grouping of three for a proper gallery moment. I think a trio of these in slightly different color palettes one warm, one cool, one neutral looks absolutely stunning and very editorial.
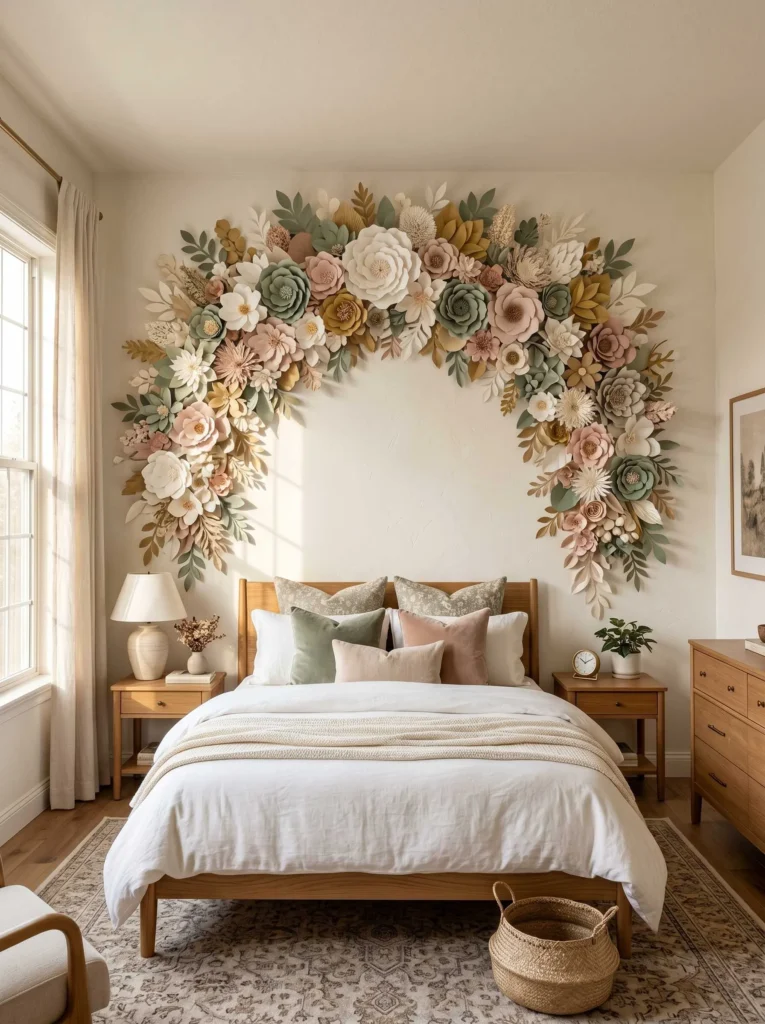
Paper Arch Backdrop Panel
A paper arch backdrop might be the single most impactful paper craft you can make for a room full stop. You create a large arched frame shape from heavy cardboard, then layer it with cut paper petals, leaves, and abstract shapes in a lush, organic arrangement. Think of it like a dried floral installation but entirely in paper. Use a warm color palette ivory, sage, blush, and dusty gold for something romantic, or go bold with deep jewel tones for drama. Mount it flat against the wall above a bed, desk, or vanity and it becomes an immediate focal point that looks like a professional installation. People genuinely cannot believe this is paper when they see it in person it has that kind of presence and scale.
Style Tips to Elevate Your Look
- Mix textures within your paper craft projects combine matte cardstock with slightly glossy paper and metallic accents so the finished piece has visual depth and doesn’t look flat.
- Stick to a color palette of three to four tones across all your paper craft room décor so everything feels cohesive even when the individual pieces are very different in style.
- Scale matters a lot one oversized paper art piece often looks more intentional than five small ones scattered randomly, so don’t be afraid to go big.
- Use quality paper for anything meant to last, like wall art or framed pieces thicker cardstock holds its shape, resists curling, and photographs much more beautifully.
- Layer your paper décor with natural textures like linen, wood, and dried botanicals so the room feels warm and collected, not like a craft fair display.
- Lighting makes paper crafts glow position fairy lights, floor lamps, or natural window light near your paper décor to show off their texture and dimension at their best.
FAQs
What kind of paper works best for cute DIY room decor ideas with paper crafts? Honestly, it depends on the project. Cardstock is great for structured pieces like geometric shapes, frames, and letters. Tissue paper is perfect for pom-poms and tassels. Crepe paper is ideal for flowers. For anything meant to last a long time, always go thicker.
Are cute DIY room decor ideas with paper crafts suitable for renters? Yes, absolutely that’s one of the best things about paper crafts. Most pieces hang with small adhesive strips or light nails, so they’re easy to remove without damaging walls. They’re a renter’s dream for personalizing a space without permanent changes.
How do I make my paper craft room decor look more professional? The biggest difference-maker is consistency. Choose a color palette and stick to it across all your paper pieces. Also, take your time with cutting clean edges make everything look more polished and intentional, even on the simplest projects.
How long do paper crafts last as room decor? With proper care keeping them out of direct sunlight and away from moisture paper crafts can last for years. Spraying delicate pieces with a light coat of clear sealant also helps protect them and keeps colors vibrant longer.
conclusion
There’s something genuinely lovely about a room that reflects the time and thought you put into it. Cute DIY room decor ideas with paper crafts give you that a space that feels personal, creative, and completely your own, without draining your bank account or requiring any professional skills. I honestly believe that the small imperfections in handmade things are what make them beautiful they carry a warmth that mass-produced decor just can’t replicate. So if you’ve been hesitating to start, I hope something here inspired you to grab some paper and just go for it. Save this post, pin your favorites, and share it with someone who’s been looking to refresh their space you might just spark their next favorite project too.


